Wednesday 20 November 2013

Back to some traditional piecing......

It's been a while since I've last worked on some traditional piecing. I was given a charm pack and a couple of matching fat quarters and I've managed to squeeze two quilts from it.
Simple piecing is a joy, just stitching almost with the brain in free fall, as the design is already decided! I'm going to combine simple machine quilting with some hand embroidery to echo some of the images in the printed fabric.


Dropped blocks, give me plenty of space to enjoy hand embroidery.


Here I have used the charm pack and bordered each square with strips from the fat quaters and set each block at an angle.
I'll post quilting ideas next.


Thursday 14 November 2013

Weedon Bec Creative Textiles Group


The last meeting of the group experimented with a technique for creating mixed media collage led by one of the group.
We worked on heavy weight vilene or pelmet vilene as a background and were asked to bring a main image printed onto transfer paper and a collection of paper images that went with it. Foils, voile and machine threads , bondaweb and Fuse Ex were also suggested.
We built up a background using torn and cut collage from our paper images and text, using the bondaweb to attach them to the vilene.
I used torn photographs of landscape and gardens to create a verdant feel. I layered this with black Fuse Ex  and  tore images of Fly Ageric mushrooms to add colour and finally my tee shirt print image which was of fantastical birds. Only at this point did I realise that they stark black and white bird images were going to be too much of a contrast...... But I used them anyway as this was a learning experience and I wanted to try all the suggested techniques. At the last minute I tried adding coloured pencil to my bird to see what effect a bit of colour would have.
Finally with added machine embroidery stitches to the surface.


Since then I have tried another experiment with the benefit of these trials and was better please with my work, using the technique to create individual labels for gifts.
Here are a couple of the labels made second time around. Probably won't do this again for a while but always interesting to try out new ideas and evaluate their place within ones own work.


Tuesday 12 November 2013

Compton Verney Textile Fair


Along with my fellow members of ICE, we took part in the Textile Fair on Saturday. Most of us have had sales of work through exhibitions and commissions but this was our first selling show.
We set up our wares in the stunning Adam Hall at Compton Verney along with ten other textile artists and collectors. 
We had all produced a range of work from cards to mounted and framed work. Quite hard to create a homogenous look when one has work from a number of artists. 
The event was well attended in the morning with many interested visitors, feedback was positive but sales slow. I'm sure a lot of visitors were there to look for ideas of things they could make themselves and the stall selling materials were always busy. It was the small items that were selling not major pieces of work.
I don't regret the day. I learned a great deal about what makes a good pitch on such events and about the type of work likely to sell.


Sunday 3 November 2013

The Makers Mark

There are just a few days remaining for this small but interesting exhibition at the Beetroot Tree. Gallery, Draycott near Derby. I went specifically to see work by Gizella Warburton and Helen Parrott.
Both these textile artists' work are abstract, textural and and as the exhibition title suggests all about the mark making.
I had seen Helen Parrott's new book "Mark Making in Textile Art" and coveted it - full of exciting ideas for creating textural interest on fabric, had heard Gizella Warburton talk about her work and was so pleased that this show was close enough to visit.

Helen's work hangs naturally in the space, dominating it, because of its size and impact.

These two pieces of Gizella's are stunning, minimalist and full of tiny details.

I'd so like to own one or two smaller pieces like these, need to think about creating a space to hang them and save up!
I had an early Christmas present from a friend that day and came home with Helen's book! I'm treating myself to a chapter a day! Very clever the way that Batsford have created such a tactile cover to the book, very strokeable!
I have already made one sample inspired by ideas in Helen's book.

Friday 1 November 2013

Full Circle Challenge

Despite everything else that I've been involved in this year I took part in the Contemporary Quilt Group Full Circle Challenge.
The theme this year was "Something beginning with S" I chose "Spirals and Squares". Each member of the group made an initial piece, based on their own theme, finished size 100 square inches. This was then sent on to the next person in the group. We were also invited to make a second companion piece
I decided to continue working on the Ammonites theme that has been a rich source of ideas this year, and use what little I had left of Esther's Ghanian fabric bought at Festival 2012.

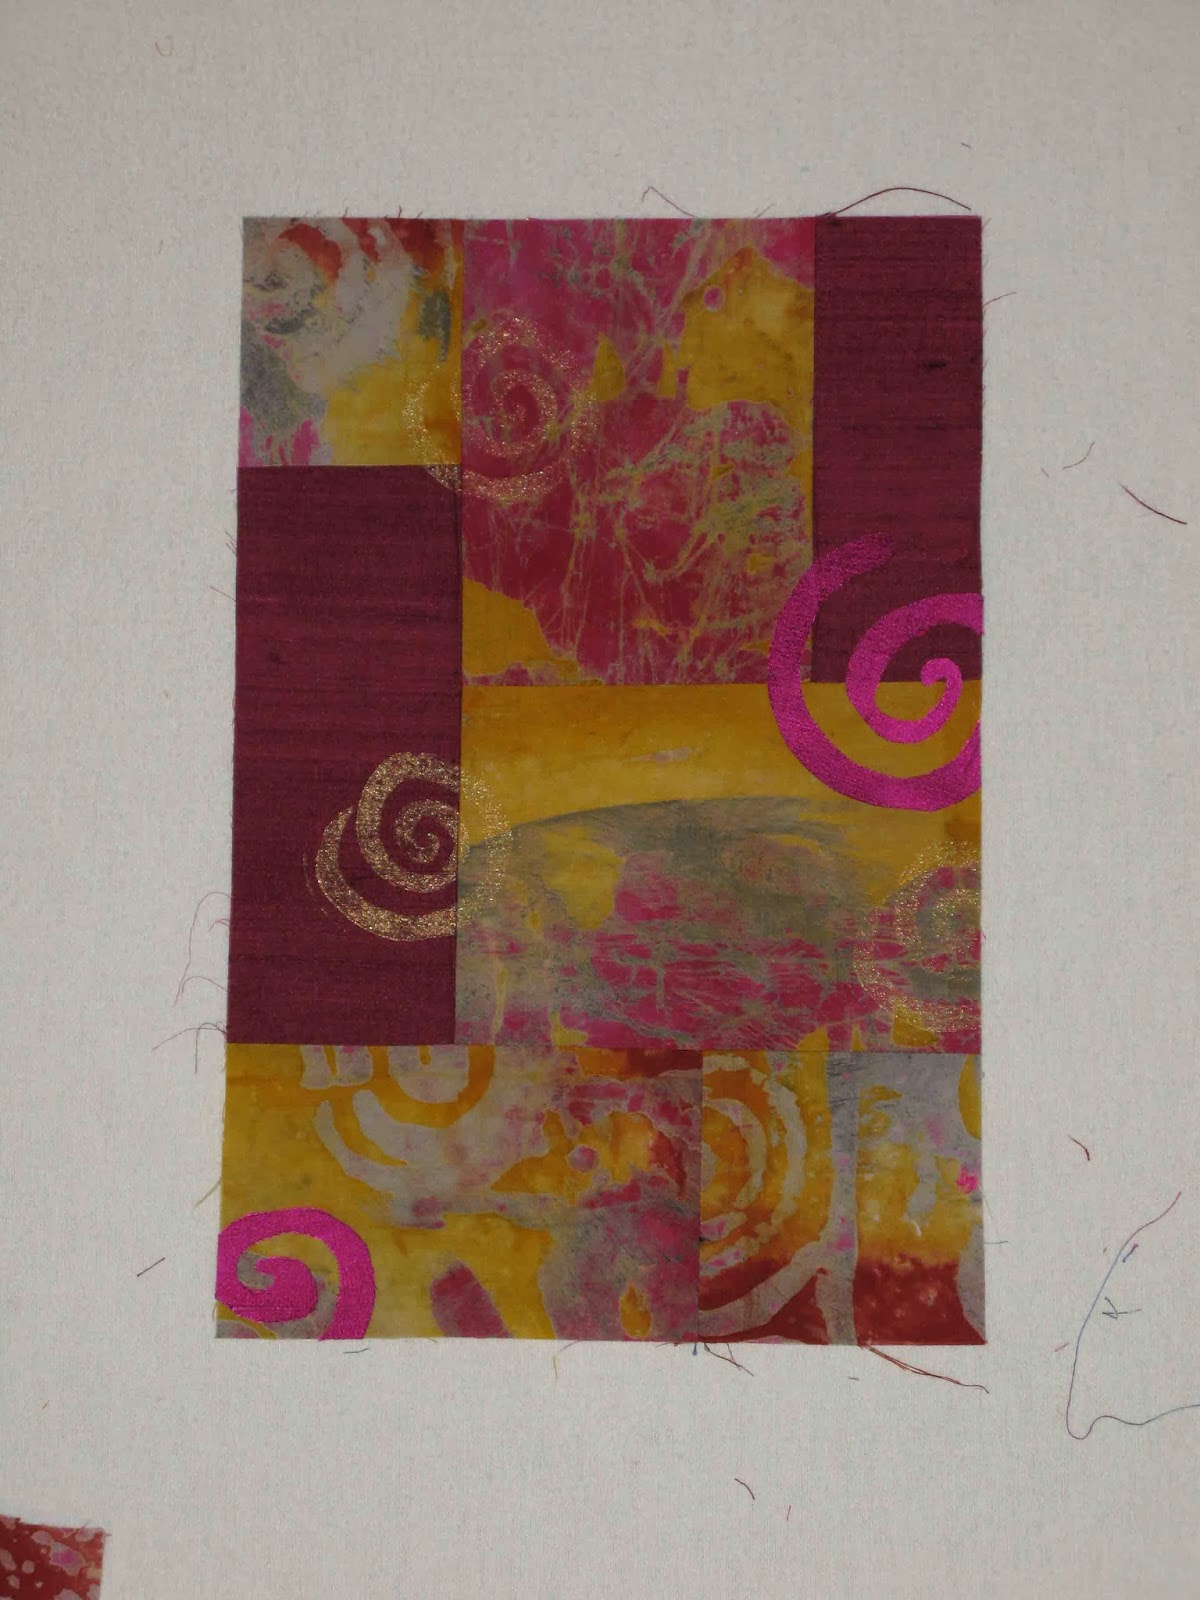
My starting 100sq inches

This piece travelled on to three more quilters, each adding a further one hundred square inches to the piece they received. The fourth was able to add two hundred square inches before posting the piece back to the originator.
I also made a companion piece. Below is the section which approximates to the piece I sent off.
I had a more holistic approach to my companion piece and stuck more closely to the Ammonites theme. This is my completed piece.


Several months later, having worked on three other mini quilt tops in between this was the piece I received back.
The stitching you can see is actually what I added, but then realised I had not photographed it as it arrived!
To this I added two panels of gold silk to echo my initial section and to get a matching size to the companion piece I made.

Here are both completed pieces.

A challenge, to add to someone else's work, be true to their initial idea but with your own flavour. The three other pieces I worked on were all very different, demanding completely different approaches. It made me think and forced me to try things I might never have thought of sticking to my own work.
I recommend the idea to any small group who want to stretch themselves within a manageable sized piece.

Lutterworth Piecemakers Exhibition

The village hall at Walcott was filled with a huge array of members quilts on the 19th and 20th October. The major element of the show was a collection of the Mystery Quilts members had created during 2013.
It never ceases to amaze me that even when the starting point of quilts is the same design, the results can be so very different!
They were very well received by visitors and a number of the patterns have been sold as a result.
A view of one aisle.


There were also many members own designed quilts and smaller items on show.

An effective and simple use of a Jelly Roll.


This quilt reminds me that a more muted Jelly Roll would make a very effective background for applique and embroidery. I used one for one of my Petra quilts a couple of years ago.


Cakes were available all day and a ready supply of tea and coffee to allow us to discuss all that we had seen, sales table, a Tombola and a raffle completed the show.  A very well attended event. More traditional than most shows I attend.

Tuesday 1 October 2013

Contemporary Expressions. Pt. 2

The second element to our exhibition was a body of work inspired by the Royal Botanical Gardens at Kew. All these works were 20" deep but the width depended on the artist. These greeted our visitors as they entered the Gallery.


I had two pieces reflecting Kew, Fantasy Flowers summed up for me the hot house foliage and flowers. A dark piece, this was a whole cloth on cream velvet. I sprayed the velvet with Dye-na-flow dyes to create a pink, green and yellow background. When dry I over sprayed with black Quink Ink and allowed that too to dry. While it dried I cut stencils in freezer paper and using discharge paste, removed the black Ink where I wanted the see the underlying colours. Now overlaying voiles in black and pink I machine quilted and embroidered the surface and used some further stamps to create some texture in the background. Finally I added gold sweetie papers under voile to create golden leaves.

Although it took a long time to make this piece I so enjoyed letting my imagination rip!

My second Kew piece started off in my brain when I saw a hydranger plant in a friend's garden in France and I knew I wanted to try and create the leaves by colouring them myself.  The natural flowers looked like this:


I then created them on white cotton with oil paint sticks, applied them to a pieced background and then quilted the petals and the leaves.

It was such a challenge to get anything like the petals. I really liked the final piece and I was thrilled when it was bought at the show!
Next time I'll share some thoughts about other exhibitions I was struck by.


Wednesday 25 September 2013

Contemporary Expressions exhibiting in Alsace.

I am delighted to report that the group's exhibition, "Hidden Treasures" was shown at La Mine d'Artgens in Sainte Marie aux Mines during the recent 19th European Meeting. . Fifty plus quilts on two themes were shown. Shakespeare's England - a collection of pieces inspired by art, artefacts and architecture from the 16th and early 17th centuries and pieces inspired by Kew Gardens.
The collection has been a good eighteen months in the creation and each of the 10 members have contributed a minimum of four pieces.
The group were delighted with the response to their work, seeing over 2500 visitors in four days.

The venue was light and felt like a proper gallery space.
My two Shakespeare pieces were:
Elizabethan Bodices:


Four small pieces based on the lacing to the back of bodices and taking four aspects of Elizabethan life, Poverty, Virginity, Piety and Usury.
 The other piece was based on the Knot Garden:


It was an interesting experience, especially in another language, but I also enjoyed brief opportunities to visit the other exhibitions. More on these later.


More design ideas for embroidery

It has been really interesting to spend time on simple methods of achieving design ideas. I have in the past used lettering to create a design and I remember visiting an exhibition of quilts at the Barbican in London years and years ago, where a very striking design had been drawn from lettering.
I spent a chunk of a day playing with possibilities for abstract work.


I first used a headline from a newspaper working in black and white and then adding colour. Where shapes touched new shapes were created when shaded. I could see this being useful in creating a sinple motif to be added to an item. Next I played with my name, but only then realised that the presence of two A's gave be far too much "background!


By choosing a different font style I had less "background" to deal with and Alyssa made a reflected letter combination which could be worth exploring as a signature on the back of quilts for instance.
I love days that open your eyes to something new!

Sunday 1 September 2013

Playing with line designs

I've enrolled again for another year of embroidery classes. We are starting off with design work, much needed by me, which I hope will have a positive effect on my own designing for quilts.
This is the aspect of my work that needs the most attention. I generally start from a collection of luscious fabrics and a vague idea of how I want to use them and then the quilt grows a bit like "Topsy", culminating in a quilt that doesn't quite work! My mission this year is to try and conquer this approach!
So have to learn to love my pencil and enjoy my Coloursoft crayons!
Working against the clock to limit thinking and worrying time we worked on a whole range of different lines and marks, quite liberating. Then isolating small sections of some of the drawings we enlarged them and begin to look at the textures that might fill them.


I tried this with several selections, each of them teaching me a little bit more about what works well and what doesn't.


What I need time to do now is to try a small composition based on a couple of these to see how I can translate them into my work. Perhaps little hand stitch pieces that can be carried with me on my travels.


Wednesday 28 August 2013

Lutterworth Embroiderers' Exhibition

Lutterworth branch are a  very well supported group with many very talented members. their recent exhibition was an excellent showcase for their varied talents.
A lovely mix of two and three dimensional pieces, some of which were made as a result of one of their weekend workshops.
I was particularly taken with a set of four minimalist landscape embroideries made by Norma Tannahill-Kay. Very evocative of wide open spaces and reminded me of some of my favourite areas of Namibia.


Mary Hart exhibited a series of five landscape pieces worked on hand dyed fabric with hand dyed threads. "Golden yellow Oil Seed Rape in April" was the one that spoke most strongly to me.


Lutterworth Embroiderers' also manage to create a wide range of saleable items including lovely little packs of fabrics and threads just to get you setting off to stitch. I bought a couple of cards made by Sarah Adcock ( A Village Quilter) pieced paper and marks which I loved.


An impressive exhibition.
Don't miss the Market Harborough Embroiderers' Exhibition on 14th and 15th September in Marston Trussell village hall as a part of Market Harborough Artist's Trail.

Thursday 22 August 2013

Play Day

Monday was fabulous! Permission to get stuck in to large sheets of paper and lots of paint!
The Weedon Bec Creative Textiles Group, the East Midlands meeting of CQ and friends, met to explore summer flowering gardens as a source of design ideas for our quilting. Led by one of the members, we worked big, using acrylic paint and anything BUT a brush.
You have no idea how liberating that was for a non- artist.
I started off and realised that I was still trying to " paint" a garden - not what I had been asked to do and constraining because , of course, it wasn't a good depiction!
With an old credit card in hand I then worked on overblown roses, but not as you see them in the garden. See below.


A couple like this in shocking pink and yellow .


My brain eventually began to see another possibility. If I painted abstract sheets of colour, I could use the scanner to print them onto fabrics which I could then use in my work.
Two abstract samples below.


The following day I did print the image onto a pre  prepared  sheet of fabric. The only problem was that image was washed out . ( a problem with that particular type of fabric sheet )
If I saturate the colour in Photoshop, and try again, it should work better.

A really excellent way of making a non painter gain confidence with paint and get interesting textile images as well. Thanks Linda.

Saturday 17 August 2013

Frances Pickering Workshop pt 2

Day two was really busy especially for me as I had to leave early to be ready to drive off to France the next day!
The pages we had pained last night now had to be ironed completely dry and fitted back inside each other exactly as they had been folded.
We were shown how to make cords and with two low tech devices it was made so much simpler!  A weight with a hook and a swivel. Having the right tools really does make a difference. These were then positioned where we needed them  so that they would be trapped between the layers.
The spent A4 paper we had painted with transfer dyes was then painted with acrylic wax and dried before being bondawebbed to the reverse of the cover made yesterday.
We were shown how to prepare the pages and stitch then into the cover too.


The photo also shows the way that the dye takes to the edges of the paper even better than the flat surfaces giving a great effect.
Suitable buttons found to create a closing and a bookmark added - Job done!
My fellow students were then able to begin to decorate the pages, choosing a theme for them and drawing and colouring them to beautiful effect.


I was thrilled to get a set of the Derwent Coloursoft crayons for my birthday as they work so well on fabric, Lutrador and on vilene and cartridge paper, very versatile and wonderful deep colours.
I now need to think about how I use my little book and with enough materials to make a second see if I have learnt enough to make a good personal piece with time to work on it.
I'm looking forward to our September Embroiderers' meeting to seeing everyone elses finishes pieces.


Friday 16 August 2013

Frances Pickering Workshop

I was lucky to have the opportunity to join a two day workshop with Frances Pickering recently. I had long admired her work and was interested to learn some techniques I could incorporate into my own work.
She was a very thorough tutor, with very clear demonstrations and instructions which was vital as there was a lot to do in two days.
I had used transfer dyes before with Angie Hughes but not to produce a complete piece. We painted and stamped paper with the transfer dyes and then ironed them onto heavy weight interfacing.

Then added additional detail by painting these onto paper too and ironing them on.
Next we used soft crayons to add detail and enhance areas before panting acrylic wax onto the surface and letting it dry.


 We then experimented with a textile soldering iron to make marks on the edges and to burn small holes through the fabric to enhance the design, followed by embroidery stitches to embellish the design. I could have spent hours on the embroidery, but hours were not available. I had to think of this as a taster or sample rather than a completed piece,


The pages of the notebook are made from heavy grade lining paper and we cut over sized double pages out and scored the folds before tearing one double page to size. Each subsequent double page was fitted inside the first and torn against these edges to create all the pages which now nestle well inside each other.
We used Koh-i-Nor fabric dyes for the page colouring, first soaking the pages in cold water and painting the double pages both sides before placing a new page over the top and repeating the painting, the idea being that the dye will bleed from page to page giving a marbled effect. When all were painted they were wrapped in baking parchment to dry naturally over night.
Hindsight is a great thing - I realise now that my choice of printing image was not the most sympathetic to the technique. All part of the learning process.
Day two to follow!


Thursday 15 August 2013

Festival .... again

I had set out this year to spend my time with quilts looking at styles of composition to help develop my ability to produce more designs that work. The time for such study was missing in the end so I concentrated on looking at little details within  quilts.
Dorothy Caldwell's huge piece "How do we know when it's light" included some lovely little examples of detailed stitch and pattern.
and
Lost, unless you stood really close to see the detail. I loved the rough stitches. So, if the detail is lost when looking at the whole piece, what is the function of the detail?

I have long admired Ineke Berlyn's stunning work and was very drwn to her piece "People"

The use of repeated shapes in different sizes and the clever use of limited colour. How, I ask myself did she decide where to put the orange and what difference would it have made if it had been placed somewhere else? These are some of the questions I need to find ways of trying to understand!

When you look at Sarah Welsby's piece "Memories of Dungerness"  you stand back and try to take in the whole. To do this this you miss the detail that makes up the overall effect. Again, what influences where the little block of colour are put?

Pauline Burbidge's Causeway III was interesting for the marks made on each square and the simplicity of the stitch. It raised all sorts of questions in my mind about process and about simplicity and detail. The sense of breeze blowing was very strong.


Christine Seager's piece "Pieces of Crow XL" were dynamic and eye catching but the subtle changes in quilting direction lost unless one "stepped- in " to the Quilt. In fact stepping back the moire fringes gave the piece movement, dancing before our eyes.

So... I have more questions than answers.... but working on these answers will be an important aspect of what I'll try and work on this year.